List items
Items from the current list are shown below.
Blog
27 Sep 2022 : Some practical 3D printing #
It's been a while since I last 3D printed anything: not since January 2019 in fact. I used to be a regular Shapeways customer, printing all sorts of gubbins from phone cases to elliptic curves, but since I moved to Finland I've been trying my best not to accumulate too much stuff (I have to be strict or my small flat would fill up far too quickly). Cutting down on physical things has also meant cutting back on my 3D printing activities.
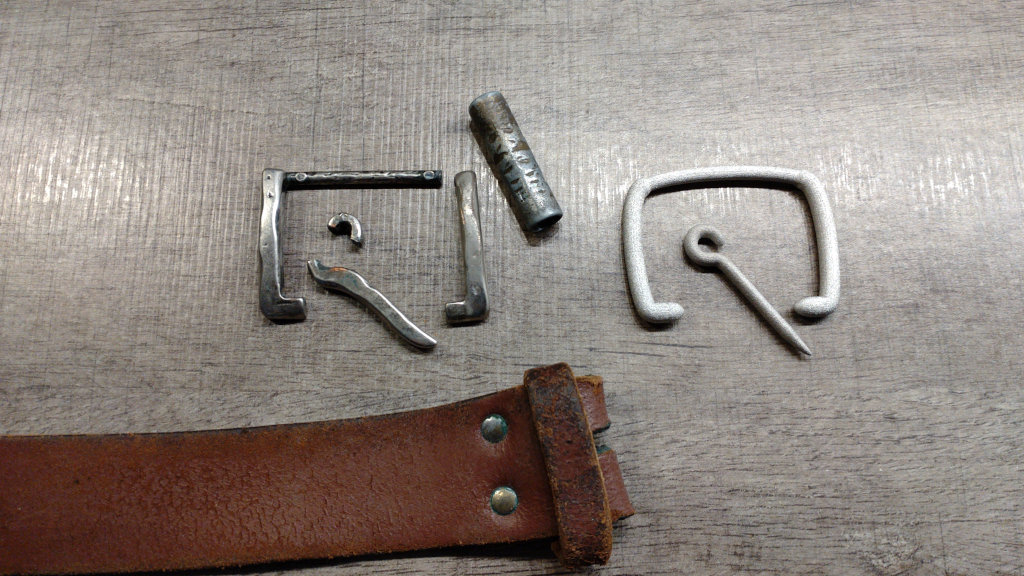
But just recently I found a reason to do some 3D printing in the name of avoiding stuff-generation. The metal buckle on my belt that's supposed to be built from three separate pieces turned into four separate pieces after the frame section split into two, leaving it structurally impaired and totally unusable for its intended purpose.
I bought the belt strap and buckle as a single unit many years ago, so this left me with a perfectly serviceable but otherwise unusable belt strap without a buckle. It would have been cheap and easy to throw the belt away and just buy a new one, but if you've read any of my other posts you'll know I keep a careful record of all my waste output. Consequently I'm always trying to find ways to reduce the amount of stuff I throw away. Binning the belt strap would have meant adding a significant chunk of weight to my waste output.
So I decided to finally put my 3D printing experience to use with something practical rather than frivolous, and print myself a belt buckle.
I've 3D printed metal objects from Shapeways before, so I knew it was possible to print something with the strength and hardness needed for the job. Initially I planned to replace just the frame, keeping the cylindrical cross-bar you can see in the photos and the single tooth from the original. Unfortunately an ill-judged application of pliers to the tooth caused that to split to two as well, so printing another tooth also became a necessity.
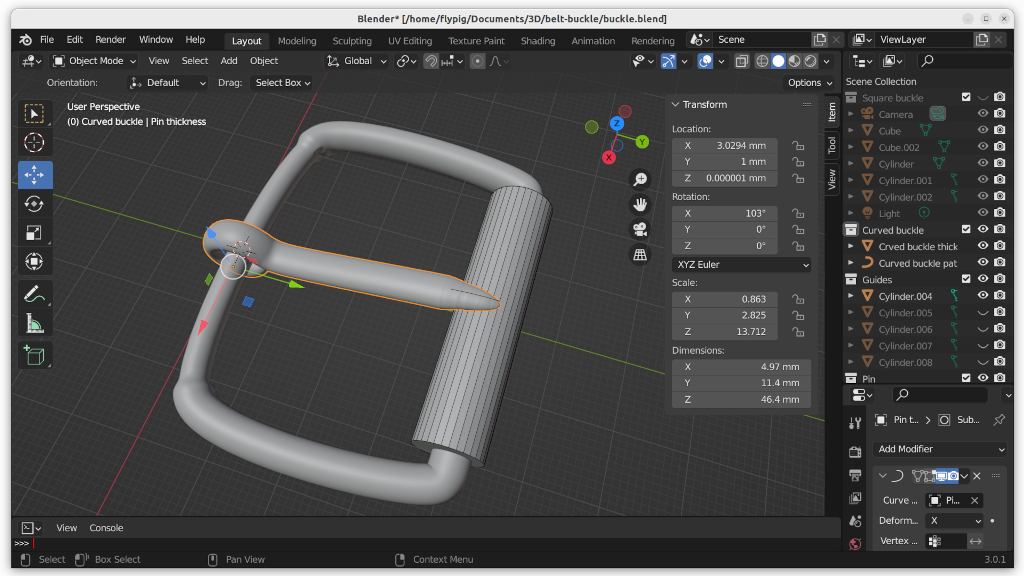
The image below shows the design I eventually came up with, created rather laboriously in Blender (I still find it a difficult application to use). I added a curve to the frame to make it easier to thread through the end of the belt strap, but otherwise left it pretty plain and simple.
Delivery of the final prints from Shapeways took four weeks. I chose Processed Stainless Steel 17-4PH (BJT) for the material is it seemed to give the best combination of strength and price. If I'd been concerned about the aesthetics I could have gone for something polished or plated, but that would have cost a bit more and I thought something a bit industrial might be appropriate here anyway.
When the pieces arrived I found that the gap in the ring on the tooth wasn't large enough to allow for it to clip onto the frame. I decided to risk the pliers again, and after several hours of effort I managed to bend it just enough for it to click into place. The tooth is also a little sharp at one end, so if I ever print it again I'll need to adjust the design slightly to fix these two issues.
It made for a nice experiment, but not a cheap one. The total cost of printing and shipping for the buckle pieces was €88.53. That's a really expensive buckle, especially when you consider that at the time of ordering I wasn't even sure if it was going to work (probably I should have printed a cheaper prototype first, but the postage and packing makes this prohibitive).
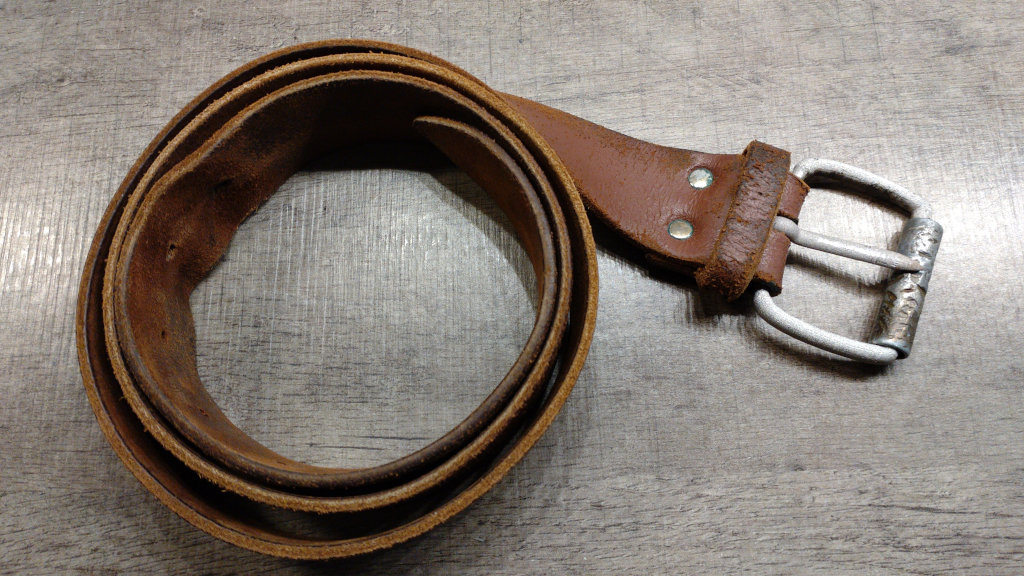
But I'm incredibly happy with the result. The pieces are very strong with minimal flex, and now that it's assembled it's working extremely effectively as a belt: I no longer need to hoist up my trousers every few minutes. And I don't need to throw away an otherwise perfectly usable belt strap, which helps to keep my waste output just a little lower. Ultimately though, it's nice just to have finally found a real practical use for 3D printing.


Comments
Uncover Disqus comments