List items
Items from the current list are shown below.
Gecko
16 Feb 2024 : Day 158 #
A couple of days back I included a small graphic that showed avatars and usernames of everyone who has helped, commented on, liked, boosted and generally supported this dev diary. Here it is again (because you can never say thank you enough!).
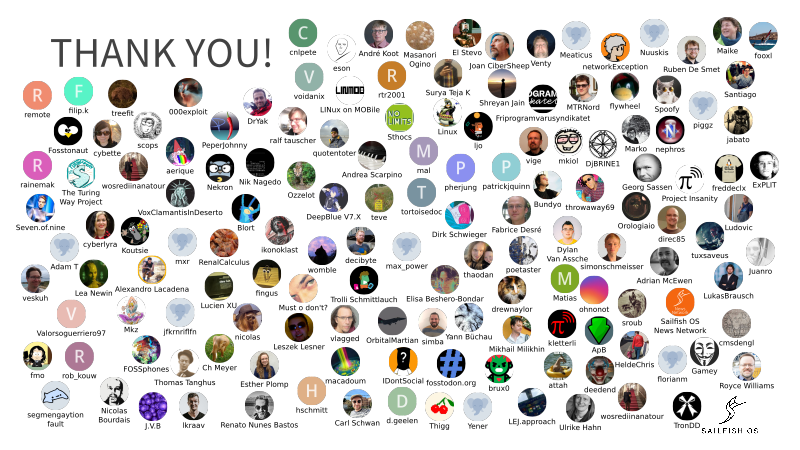
It's actually a slide from my FOSDEM presentation, and while I do like it, that's not the real reason I'm showing it again here. During my presentation I mentioned that it had taken me a long time to create the slide. And that's true. But I thought it might be interesting to find out how it was created. Maybe it could have been done in a simpler, better, or quicker way?
Creating it required four steps:
Let me first give a quick overview of how I collected the data in step one. This did take a long time — longer than I expected — primarily because there were more people interacting with my dev diary than I'd quite appreciated. Initially I collected names from the sailfish forum. There's a thread about the dev diary and I picked up most of the names from there, or from direct messages.
Each user on the forum has an avatar, even if it's been auto-generated by the Discourse forum software. Whenever someone posts their avatar is shown next to their comment. But this is a small version of the avatar. Select the username at the top of a post and a more detailed summary of the account is shown, including a larger version of the same image. Right click on this and it can be saved out to disc.
If you try this you'll notice the avatar is actually a square image, even though it's shown in the forum as circular. A mask is being applied to it on the client side. This will be important for step two.
At this point I also added other users I could think of who, while they may not have made a post on the forum, had nevertheless interacted in important ways with the dev diary. This included many different types of interactions such as comments on IRC or matrix. In this case, I also found their avatars and usernames on the forum.
While doing this I kept a CSV file as I was going along containing two columns: username and avatar filename.
Finally I checked my Mastodon account for all the users who had interacted with my posts there. I stepped through all 149 of my dev diary Mastodon posts (as it was at the time), checking who had favourited, boosted, or replied to a post there. Once again I took a copy of their avatar and added their details to the CSV file.
So far so manual. What I was left with was a directory containing 145 images and a CSV file with 145 rows. Here's the first few rows of the CSV file to give you an idea:
That brings us on to step two, the processing of the avatars (which sounds far more grand than it is). Different avatars were in different formats (jpeg or PNG), with different sizes, but mostly square in shape. They needed to all be the same size, the same format (PNG) and with a circular mask applied.
For this I used the convert tool, which is part of the brilliantImageMagick suite. It performs a vast array of image manipulations all from the command line. Here's just the a small flavour from its help output:
All of the work is done by the convert tool, via this simple addmask.sh script. It's so simple in fact that I can give the entirety of it here without it taking up too much space:
Nevertheless the script lived on in my file system and finally found itself a use. To be honest, I was pretty tight for time writing up my presentation for FOSDEM so I'm not sure if I'd have gone down this route if I didn't already have something to build on. I made some small changes to it to handle resizing, but that was pretty much the only change.
That brings us to step three. Now having a directory full of nicely processed images, I needed them to be arranged on a canvas, ideally in SVG format, so that I could then embed the result on a slide.
Since starting my role as a Research Data Scientist I've been immersed in random Python scripts. Python has the benefit of a huge array of random libraries to draw from, SVG-writing included in the form of the drawsvg 2 project. It is, honestly, a really simple way to generate SVGs quickly and easily. Now that I've tried it I think I'll be using it more often.
My aim was to arrange the avatars and names "randomly" on the page. I started by creating a method that placed a single avatar on the canvas with the username underneath. Getting the scale, font and formatting correct took a little trial and error, but I was happy that the final values all made sense. The drawsvg coordinate system works just as it should!
Arranging them at random requires an algorithm. My first instinct was to arrange them all in a grid, but with a random "jitter" applied. That is, for each image select a random angle and distance and move it by that amount on the page.
The script I created for this is a little too long to show here, but you can check it out on GitHub.
Here's how I ran it:

The avatars have been placed, but the grid formation is still very clear despite the added jitter, plus there's a gap at the end because the number of avatars in total doesn't divide by the number of avatars on each row. I wasn't happy with it.
So I came up with an alternative solution: for each avatar a random location is chosen on the canvas. As each avatar is added its position is stored in an array, then when the next position is chosen it's compared against all of these positions. If it's within a certain distance (60 units) of any of the other points, it's rejected and a new random position is chosen.
Again, you can see this algorithm given in the same file on GitHub. Here's how I ran it:
But I found given enough space to locate the avatars the process actually finished pretty quickly. And since I only need to run it once, not multiple times, that's actually not a problem.
In retrospect a better algorithm would have been to partition the canvas up into a grid of sizes much smaller than an avatar. Ideally it would be one pixel per pixel, but in practice we don't really know what a pixel means in this context. Besides which something approaching this is likely to be fine. Now store a Boolean associated with each of these grid points indicating whether it's available or used.
After placing an avatar mark the pixels around the location in this grid as being used, to the extent that there will be no overlap if another avatar is placed in any of the unused spots. Keep a count of the available locations.
Then a random number can be chosen between zero and the total remaining available locations in order to select the next spot.
I didn't implement this, but in my head it works really well.
Finally step four involved tidying up the files. Some of the avatars and usernames were overlapping so needed a bit of manual tweaking (but thankfully not too much). Plus I also had to manually make room for the "Thank you" text in the top left of the window. This required a bit more manual shuffling of avatars, but it all worked out in the end. I'm quite happy with how it came out.
That's it. Just a little diversion into the scripts used to create the image; I hope it's been of some interest.
There will be more of the usual gecko dev diary tomorrow.
If you'd like to read any of my other gecko diary entries, they're all available on my Gecko-dev Diary page.

It's actually a slide from my FOSDEM presentation, and while I do like it, that's not the real reason I'm showing it again here. During my presentation I mentioned that it had taken me a long time to create the slide. And that's true. But I thought it might be interesting to find out how it was created. Maybe it could have been done in a simpler, better, or quicker way?
Creating it required four steps:
- Collect the names and avatars.
- Process the avatars.
- Plot the names and avatars on the canvas.
- Tidy things up.
Let me first give a quick overview of how I collected the data in step one. This did take a long time — longer than I expected — primarily because there were more people interacting with my dev diary than I'd quite appreciated. Initially I collected names from the sailfish forum. There's a thread about the dev diary and I picked up most of the names from there, or from direct messages.
Each user on the forum has an avatar, even if it's been auto-generated by the Discourse forum software. Whenever someone posts their avatar is shown next to their comment. But this is a small version of the avatar. Select the username at the top of a post and a more detailed summary of the account is shown, including a larger version of the same image. Right click on this and it can be saved out to disc.
If you try this you'll notice the avatar is actually a square image, even though it's shown in the forum as circular. A mask is being applied to it on the client side. This will be important for step two.
At this point I also added other users I could think of who, while they may not have made a post on the forum, had nevertheless interacted in important ways with the dev diary. This included many different types of interactions such as comments on IRC or matrix. In this case, I also found their avatars and usernames on the forum.
While doing this I kept a CSV file as I was going along containing two columns: username and avatar filename.
Finally I checked my Mastodon account for all the users who had interacted with my posts there. I stepped through all 149 of my dev diary Mastodon posts (as it was at the time), checking who had favourited, boosted, or replied to a post there. Once again I took a copy of their avatar and added their details to the CSV file.
So far so manual. What I was left with was a directory containing 145 images and a CSV file with 145 rows. Here's the first few rows of the CSV file to give you an idea:
000exploit, 000exploit.png
aerique, aerique.png
Adrian McEwen, amcewen.png
ApB, apb.png
Adam T, atib.png
[...]
You'll notice that it's in alphabetical order. That's because after collecting all the details I ran it through sort on the command line.
That brings us on to step two, the processing of the avatars (which sounds far more grand than it is). Different avatars were in different formats (jpeg or PNG), with different sizes, but mostly square in shape. They needed to all be the same size, the same format (PNG) and with a circular mask applied.
For this I used the convert tool, which is part of the brilliant
$ convert --help
Version: ImageMagick 6.9.11-60 Q16 x86_64 2021-01-25 https://imagemagick.org
Copyright: (C) 1999-2021 ImageMagick Studio LLC
License: https://imagemagick.org/script/license.php
Features: Cipher DPC Modules OpenMP(4.5)
Delegates (built-in): bzlib djvu fftw fontconfig freetype heic jbig jng jp2
    jpeg lcms lqr ltdl lzma openexr pangocairo png tiff webp wmf x xml zlib
Usage: convert-im6.q16 [options ...] file [ [options ...] file ...]
    [options ...] file

Image Settings:
  -adjoin              join images into a single multi-image file
  -affine matrix       affine transform matrix
  -alpha option        activate, deactivate, reset, or set the alpha channel
  -antialias           remove pixel-aliasing
  -authenticate password
                       decipher image with this password
  -attenuate value     lessen (or intensify) when adding noise to an image
[...]
Happily for me, all three of my desired conversions (changing format, changing size, applying a mask) were available using the tool. I put together a very simple bash script which cycles through all of the files with a given format in a folder, processes them in the way that was needed and then output them to a different folder with a suffix added to the filename.All of the work is done by the convert tool, via this simple addmask.sh script. It's so simple in fact that I can give the entirety of it here without it taking up too much space:
SUFFIX_FROM=$1
OUT_FOLDER=$2
SUFFIX_TO=$3

set -e

if [ $# -ne 3 ]; then
        echo "Syntax: " $0 "<extension-in> <out-folder> <out-suffix>"
        exit 0
fi

SUFFIX_FROM_DOT="${SUFFIX_FROM}."

echo "Converting <image>.$SUFFIX_FROM images to <image>-$SUFFIX_TO.png"
echo

for name in *.$SUFFIX_FROM; do
	newname="${name%.*}$SUFFIX_TO.png"
        echo "Converting $name to $OUT_FOLDER/$newname"
	convert "$name" masks/mask.png -sample 240x240 -alpha Off -compose \
	    CopyOpacity -composite -density 180 -background transparent \
	    "$OUT_FOLDER/$newname"
done
I then called it a couple of times inside the folder with the images to produce the results needed:
$ ./addmask.sh png masked -masked
$ ./addmask.sh jpg masked -masked
After processing, each of the updated images is given a new name, so I had to perform a regex search and replace on my CSV file to update them appropriately. The file now looks like this:
000exploit, 000exploit-masked.png
aerique, aerique-masked.png
Adrian McEwen, amcewen-masked.png
ApB, apb-masked.png
Adam T, atib-masked.png
[...]
I have to admit that I cheated a bit with this script. I originally wrote it back in September 2022 for Jolla's "Sailing for Ten Years" party held in Berlin on 14th October of the same year. Nico Cartron wrote up a nice summary of the event in the Sailfish Community News at the time. I was asked to give a presentation at the event; one of the slides I created for it was a thank you slide not unlike the one above. In that case it was for translators and apps, but it never actually got used during the event.
Nevertheless the script lived on in my file system and finally found itself a use. To be honest, I was pretty tight for time writing up my presentation for FOSDEM so I'm not sure if I'd have gone down this route if I didn't already have something to build on. I made some small changes to it to handle resizing, but that was pretty much the only change.
That brings us to step three. Now having a directory full of nicely processed images, I needed them to be arranged on a canvas, ideally in SVG format, so that I could then embed the result on a slide.
Since starting my role as a Research Data Scientist I've been immersed in random Python scripts. Python has the benefit of a huge array of random libraries to draw from, SVG-writing included in the form of the drawsvg 2 project. It is, honestly, a really simple way to generate SVGs quickly and easily. Now that I've tried it I think I'll be using it more often.
My aim was to arrange the avatars and names "randomly" on the page. I started by creating a method that placed a single avatar on the canvas with the username underneath. Getting the scale, font and formatting correct took a little trial and error, but I was happy that the final values all made sense. The drawsvg coordinate system works just as it should!
Arranging them at random requires an algorithm. My first instinct was to arrange them all in a grid, but with a random "jitter" applied. That is, for each image select a random angle and distance and move it by that amount on the page.
The script I created for this is a little too long to show here, but you can check it out on GitHub.
Here's how I ran it:
$ python3 createthanks.py names.csv thanks-grid.svg --grid
Using grid formation
Exported to thanks-grid.svg
The results weren't good, as you can see for yourself in this image.
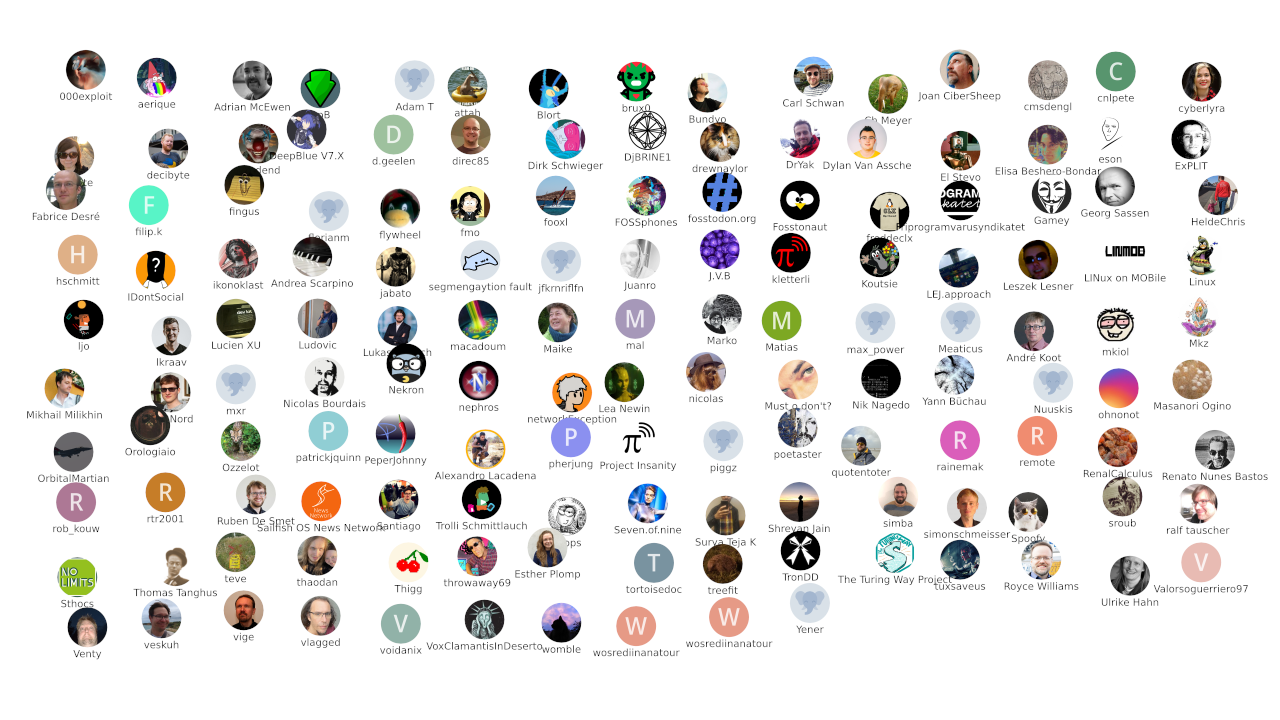
The avatars have been placed, but the grid formation is still very clear despite the added jitter, plus there's a gap at the end because the number of avatars in total doesn't divide by the number of avatars on each row. I wasn't happy with it.
So I came up with an alternative solution: for each avatar a random location is chosen on the canvas. As each avatar is added its position is stored in an array, then when the next position is chosen it's compared against all of these positions. If it's within a certain distance (60 units) of any of the other points, it's rejected and a new random position is chosen.
Again, you can see this algorithm given in the same file on GitHub. Here's how I ran it:
$ python3 createthanks.py names.csv thanks-random.svg
Using random formation
100%
Exported to thanks-random.svg
This is the approach I ended up using, so you can see the results in the original slide. But it's not ideal for several reasons. Most crucially it's not guaranteed to complete, for example if there isn't enough space to fit all of the avatars the algorithm will hang indefinitely while it tries to find a place to position the next avatar. It's also inefficient, with each location being compared with every other and a potentially large number of rejections being made before a suitable location is found at each step.
But I found given enough space to locate the avatars the process actually finished pretty quickly. And since I only need to run it once, not multiple times, that's actually not a problem.
In retrospect a better algorithm would have been to partition the canvas up into a grid of sizes much smaller than an avatar. Ideally it would be one pixel per pixel, but in practice we don't really know what a pixel means in this context. Besides which something approaching this is likely to be fine. Now store a Boolean associated with each of these grid points indicating whether it's available or used.
After placing an avatar mark the pixels around the location in this grid as being used, to the extent that there will be no overlap if another avatar is placed in any of the unused spots. Keep a count of the available locations.
Then a random number can be chosen between zero and the total remaining available locations in order to select the next spot.
I didn't implement this, but in my head it works really well.
Finally step four involved tidying up the files. Some of the avatars and usernames were overlapping so needed a bit of manual tweaking (but thankfully not too much). Plus I also had to manually make room for the "Thank you" text in the top left of the window. This required a bit more manual shuffling of avatars, but it all worked out in the end. I'm quite happy with how it came out.
That's it. Just a little diversion into the scripts used to create the image; I hope it's been of some interest.
There will be more of the usual gecko dev diary tomorrow.
If you'd like to read any of my other gecko diary entries, they're all available on my Gecko-dev Diary page.
Comments
Uncover Disqus comments